From AI to Photoshop and Back - Mastering the Round-Trip Workflow
Learn how to combine AI generation with manual editing using the round-trip workflow 💅
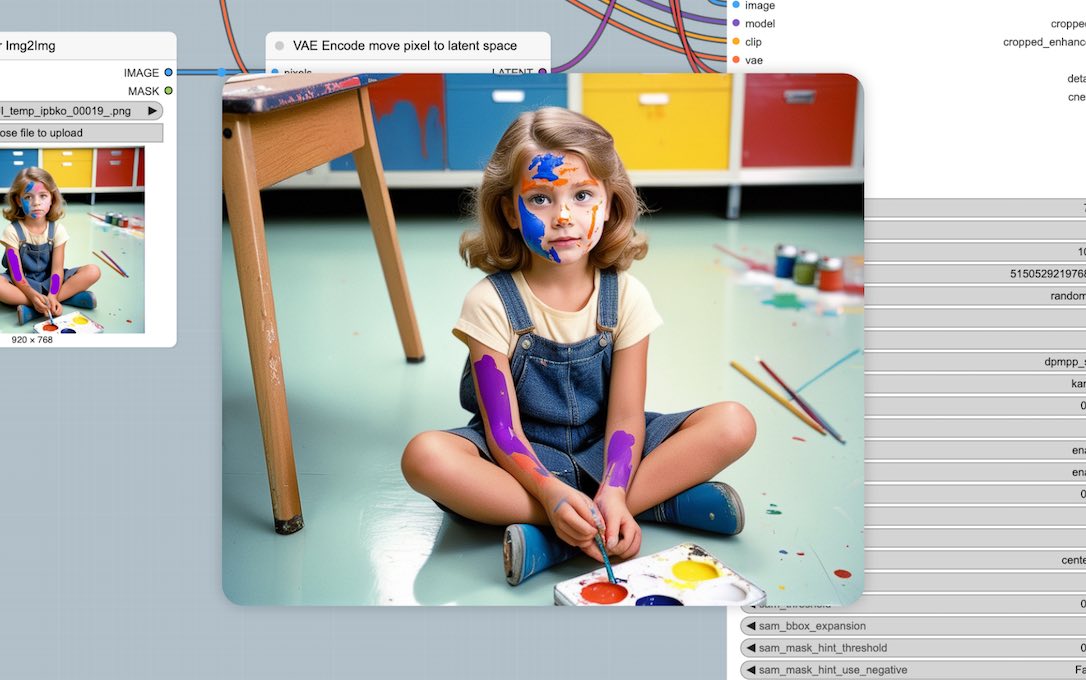
Below I will show you a cool example of the “round-trip” technique between ComfyUI and a photo editor. The workflow is simple yet powerful:
- Generate a base image in ComfyUI
- Edit in photo software
- Return to ComfyUI for AI refinement
- Update prompt to match your edits
Step 1: Initial Generation (Txt2Img)
Open ComfyUI and craft a descriptive prompt like “candid photograph of a young girl sitting on classroom floor holding colored pencils, paint on her face.” Pick your favorite model, sampling steps and CFG scale, then hit generate. This process is called “Txt2Img” and is the foundational AI image generation process where you provide only a text prompt and the system creates an image from scratch.
Step 2: Your Artistic Intervention
Save this image and open it in your photo editor (Krita and GIMP are free choices). Now it’s your turn to make some modifications. I added rough brush strokes to her arms (the purple ones) - you don’t need to become Monet in this step, just do basic strokes and the AI will understand based on our future instructions. Save and load it back into ComfyUI.
Step 3: The AI Refinement (Img2Img)
Process your edited image through KSampler again. Maintain your original prompt while incorporating your recent modifications: “…holding colored pencils, PURPLE paint on her arms.” This process is called “Img2Img” - a technique where you input an existing image and the AI generates a new version that preserves your core composition while refining your manual edits.
Technical tip: Reduce the denoise parameter to preserve the integrity of your manual edits. And also critically important: utilize a different seed value than your original generation. Identical seeds create rendering conflicts as the diffusion model attempts to match the original noise pattern with your new instructions, resulting in some ghost outlines that compromise image quality.
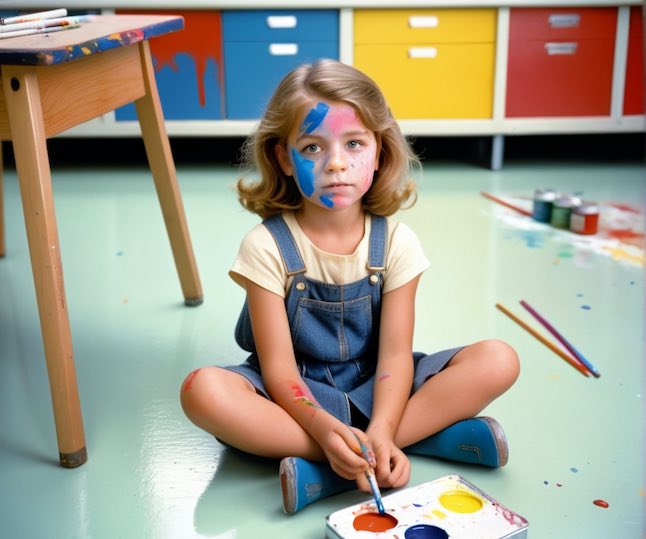
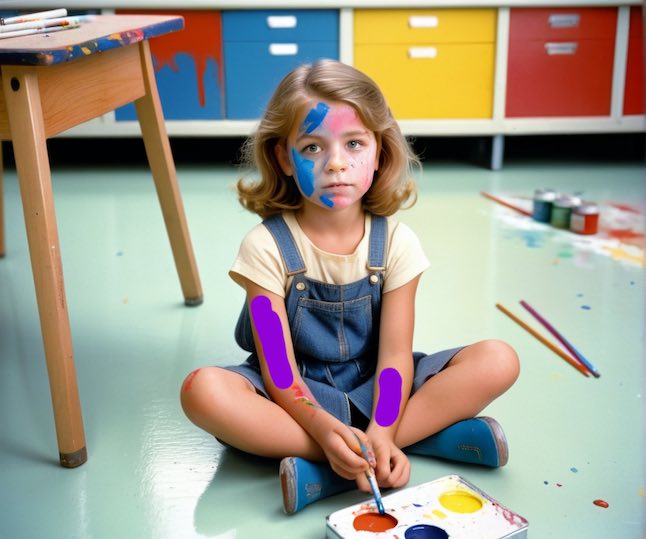
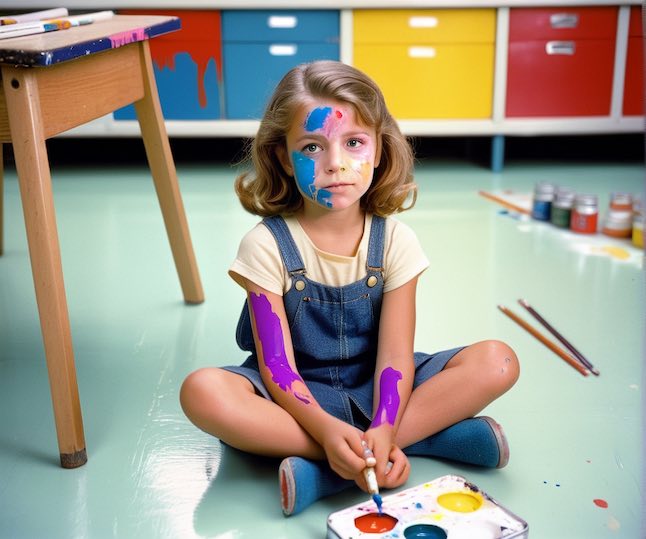
Step 4: Final Refinement
For enhanced detail refinement, I processed the image through the face detailer module (see link below). To make it more interesting, I added “orange paint” to the wildcard specification — this instructs the AI to incorporate this color onto her face while maintaining overall composition.
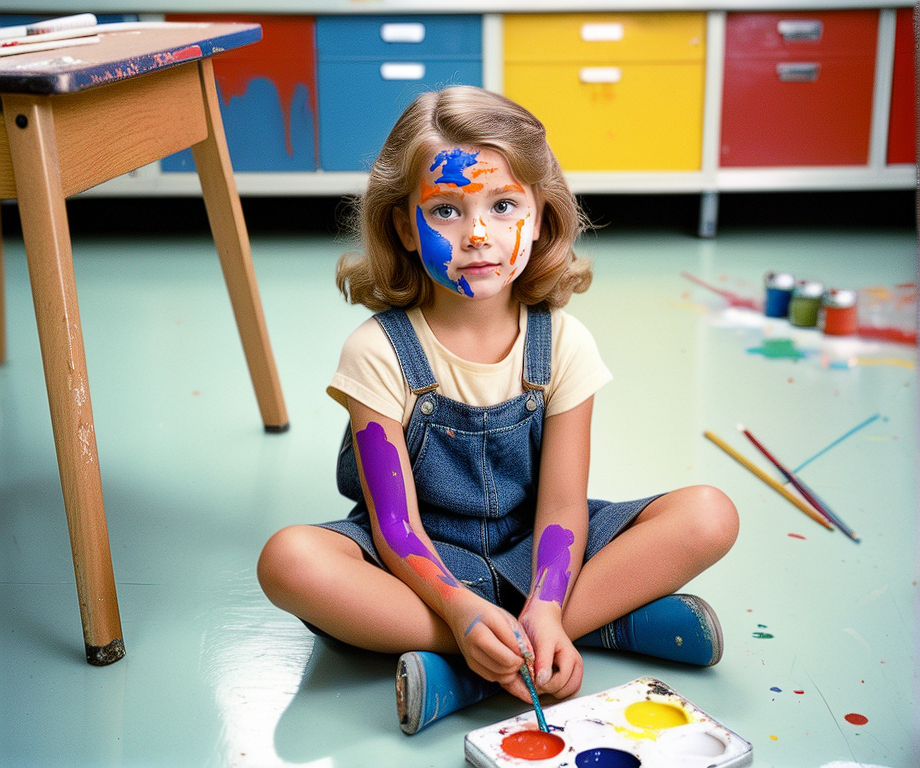
For beginners diving into Stable Diffusion, this technique is a game-changer. No longer are you limited to what the AI decides - you’re the art director, using the AI as your super skilled assistant. 🎨 ✨
If you would like to check my workflow, just save the above image to your computer and drag-&-drop it inside ComfyUI. But first you will need to install:
- SDXL checkpoint model of your choice
- LoRA for better faces
- Impact Pack for Face Detailer module
- ComfyUI Essentials for the final sharpeness punch